In this tutorial we show you how to change the extension of our screenshots from PNG to JPG on both iPhone/iPad and macOS.
Mobile phones and laptops are part of our day to day life and it is already an essential tool for the vast majority of users, providing a multitude of options that seek to make our lives easier. The number of tasks that they can perform is simply overwhelming.
One of the most performed actions by many users is to take screenshots, either by sharing an image with a friend, or to immortalize a part of a conversation or show someone content that we think is interesting.
While most Android devices take screenshots in JPG format, Apple operating systems opt for PNG screenshotswhich for some may be a handicap, since they usually have a larger file size, but they also have their advantages.
That is why we are going to show you how we can change its extension and format, both on iPhone (also applicable to iPad) and on Mac computers, without the need to go to pages or programs that perform the conversion for us.
How to Change PNG Captures to JPG on iPhone
The easiest way to obtain a capture in JPG format on our iPhone previously was using the crop tool, which is integrated into the view that we obtain when we click on the capture that we find in the lower left.
But in the new versions these cropped screenshots are already saved automatically in PNGas Apple considers this format to be ideal and its compression helps maintain as much detail as possible.
Therefore the most efficient solution without the need for programs is to send us the screenshot via AirDrop, which will send it in JPEG format instead of PNG. In order to carry out this method, it is evident that we would need to have access to a Mac.
In this way, if our laptop or another iPhone/iPad receives this capture, it will be in the format we want without the need for any changes.
In case you do not have another Apple device, there is a very interesting solution and it is using Apple Shortcuts. To do this, we must click on this link. This will be installed automatically on our iPhone, iPad or even Mac if we wanted.
With this shortcut we can select a photo from our gallery and choose what format we want to convert it to, and then again choose where we want to save it. As we can observe there are also different types of formats to choose fromalthough the one we want is JPEG.
How to take screenshots in JPG on macOS
For Mac computers the process is much simplersince the fact of changing the output format of it only requires a small command in the terminal.
In this case, if we want all our captures to be made in JPEG, we must enter the following command in the Terminal application and click on the enter button, and automatically without doing anything our system will change the format.
defaults write com.apple.screencapture type jpg;killall SystemUIServer
It’s amazing how easy we can make such a simple change on different Apple platforms, where It would be interesting if in the iPhone Settings they allowed you to switch between the different formats.
As we can well see in the image below, our captures are now saved in the format indicated in the previous command, thus making the images take up less space in our system.
If we wanted to make the captures again in PNG format, we would simply need a command again, which would be the following:
defaults write com.apple.screencapture type png;killall SystemUIServer
Commands to take screenshots on Mac
Many users of the range of Apple computers often use applications when taking screenshots in macOS, sometimes due to total ignorance of the commands that the system itself provides us.
And there are two ways to take screenshots on these Macs, where we find an option to make a total capture of what we can observe, or also a partial capture of it.
In case you want a total screenshot, we must press the buttons at the same time Command, Shift (up arrow) and the number 3. In this way it will be saved as a JPG image on our desktop.
If we want a partial capture, we must follow a fairly similar command, where we also press the buttons at the same time Command, Shift and this time the number 4. The mouse pointer will change and that tells us that we must select which specific area we want to capture.
Is PNG better than JPG?
There are some significant differences between JPEG images and PNG images, but it’s hard to say if one is better than the other.
JPEG images are usually smaller, making it easy to store and share. It’s also easy to reduce the size of a JPEG even further.
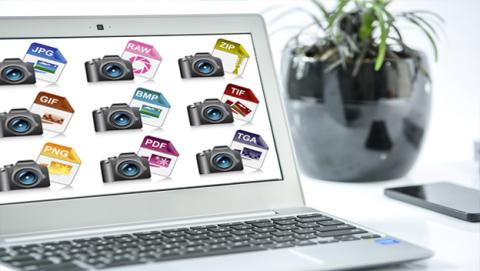
When to use JPG, GIF, PNG, RAW and other image formats?
However, PNG images are of higher quality and can be transparent, although for the specific case of screenshots this is not important.
It all depends on whether the user takes a lot of screenshots and in turn how much space they have available on their Mac or iPhone where the decision of which format can be important.
We hope that with these little tricks you can easily choose between the two most common formats that we can find today, and that we hope that they will be of great help in the future.
George is Digismak’s reported cum editor with 13 years of experience in Journalism